• Sngine Community Message
    Welcome to the Sngine Help and Support Community! We are a vibrant gathering of individuals who share a common goal: to support one another on our journeys, regardless of our skill levels. Whether you are just starting out or you consider yourself an expert, you are not alone here; we believe that together, we grow stronger and more capable. We invite you to explore our community, engage with fellow members, and take a moment to familiarize yourself with our community guidelines. Your presence enriches our collective experience, and we’re excited to have you with us!

    Resource Downloading $7.00 for 1 month - Click Here
    We apply a nominal fee for accessing and downloading our valuable resources. This small investment ensures that all proceeds are reinvested into enhancing our website and acquiring additional resources to better serve our community. Your support plays a crucial role in helping us expand and improve our offerings!

Setting up Cloudflare R2

Cloudflare R2​

After installing Sngine, now you can, in easy steps integrate Cloudflare R2 with it to let your users use it

  1. First, go to: https://dash.cloudflare.com/ and sign in with your Cloudflare account
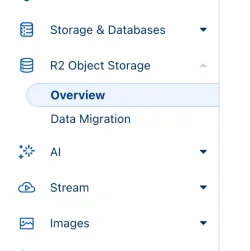
  2. No,w click on R2 Object Storage

    image
  3. Now click on API, then click on Manage API Token

    image
  4. Now, click on Create Account API Token

    image
  5. Create the token with the following permissions:

    image
  6. You will get the Access Key ID, Secret Access Key and S3 client endpoint, which youcan copy and paste later in the Sngine Admin panel -> Settings -> Upload Settings

    image
  7. Now you will need to create a bucket, so click on Create bucket

    image
  8. Now you will need to configure the bucket CORS policy, so click on Settings, then fromthe CORS Policy section, click on Add

    image
  9. Add the following CORS policy:
Code:
[
  {
    "AllowedOrigins": ["*"],
    "AllowedMethods": ["GET", "HEAD"],
    "AllowedHeaders": ["range"],
    "ExposeHeaders": [
      "Content-Type",
      "Access-Control-Allow-Origin",
      "ETag"
    ],
    "MaxAgeSeconds": 3600
  }
]


image
  1. Now you will need to use Custom Domain, so from the Custom Domains section,n click on Add

    image

    image

    image
  2. Finally, you need to copy and paste the data inthe Sngine Admin panel -> Settings -> Upload Settings

    image
 

Attachments

  • R2-01.webp
    R2-01.webp
    15.8 KB · Views: 0

Donate: Campaign

Total amount
$0.00
Goal
$60.00

AdSense

Back
Top